Thursday, August 16, 2012

Pick a Post. Any Post.

Yep, it has been a week since I blogged.  Again that crazy lack of time thing.  I have many ideas right now on which to blog but I can't pick...so these are the topics

  1. Goldfish crackers--my ability to suck down an entire bag
  2. Let's Get Physical--going back to the gym & my inability to not nitpick other people's exercise effort
  3. Aerobic Instructors: True Sadists--seriously, do I really have to do 200 jumping jacks then right into 200 squats?
  4. Time in a Sippy Cup--three hours of time to yourself that only people with small children can understand
  5. The Trifecta--of course, this involves poop
  6. Real Men; Real Husbands--title says it all
  7. To Pain or Not to Pain? Is there a question?--choosing an epidural
  8. Pregnant & Puking--why I don't like being pregnant
    1. Hyperemesis Gravidarum! Sounds like the HP spell that makes you puke non stop for what feels like an eternity
This is where I am right now.  Not sure which I want to start with.  You have an opinion? I'd like to hear it.  Otherwise, I might put these all in a hat and just pick.  


Thursday, August 9, 2012

Phone Blogging

This is a test because I don't believe that it is actually going to work.

Wednesday, August 8, 2012

Hmmm...Pensive Realization

So, one thing that I have learned about this blogging stuff is that you have to blog pretty much right away about something that you want to blog about.  It is kind of like those dream journals.  If you want to track/remember your dreams as soon as you wake up you are supposed to jot down all the adventures you had in dreamland in that journal that you keep on you night stand, right next to your bed.

For me, it isn't so easy as per a previous blog, "Mommy Time". There have been a few things on my mind lately and I have really wanted to chat about them, but by the time I had time to, which is right now, the emotions I had have dwindled.

I am actually kind of ticked that I have no desire to write about those ideas with all this time that I have.  Grrrr!

Well, c'est la vie.


Because I Said So

Doesn't that just say it all?  "Because I said so."  Well, it should.  As a kid, of course, it didn't make sense.  But now, as an adult, it makes perfect sense.  When I tell my kids to do something.  They ought to just do it.  Instead of "Why?"  Why?  Why would you, my children 3 & 5 year olds question why?  There is no, 'why'.  You just do it because I said so.

Monday we had a great day planned to meet up with some friends and their kids and go to some boardwalk rides.  I really wanted to go.  I wanted to hang out with adults while my kids had fun on the rides.  Countless times I threatened that we were not going to go if they did not stop their bickering, their whining, their defiance.  To add, this was all before 8:30 AM.

Soon I left to take my son to speech.  On the way there, we had a long chat about behavior and he seemed to understand as much as he could being 3 and all.  Then speech was over and we headed back home.  We did our ritual stop at Wawa; he got a Slurpee and donuts.  I got coffee. All was great in the world.  Then I got home...

Lunch was ready but there were playing cards all over the table and the floor.  They were my son's.  "Buddy, clean up your cards, please." The boy stopped dead in his tracks.  Looked up at me with a huge defiant there-is-not-a-chance-in-the-world-that-I-am-going-to-clean-up-those-cards grin.  Hmpf, is that so.  "Clean them up or you are not going to the rides." I got the same look.  "That's it!  You are NOT going to the rides!"  Through deep, pleading sobs the cards were picked up.  And to add, every last crumb of his lunch was eaten.  The repetition of, "Can I go now?" resounded.  "No, Buddy, you cannot go." He was devastated.  I was devastated.  I wanted to take both my kids and have some fun. That was just brutal.

Now, this is where one might think the story to be over. That I took my daughter and my son learned a hard, but necessary lesson.  Nope.  Through all of the commotion with my son, my daughter keep checking, "Am I still going?"  And she was.  She was listening.  She was well behaved.

Until...

We were moments before leaving.  Moments before heading to the boardwalk.  Moments to some fun by the water.

I got my daughter completely sunblocked, which is a feat within itself as our entire family is so pale we pretty much reflect the sun.  I maintain that if we were ever stranded on a desert island we could just lay ourselves on the beach and a rescue plane would spot us from miles away. Hopefully, before we all burned to crisps. I put on her last article of clothing, when my son picked up one of her slippers.  I told her not to worry about it as she was going to the rides and all my son had at that moment was the slipper.  Well, the second she was done getting dressed, she bee-lined for the slipper and ripped it off my son's foot. "That's it!  You are not going now!"  Shock ensued. Tears ensued.  Screaming ensued.

Now, it is my turn to question why.  Why?  Why couldn't we just go to the boardwalk and have fun?  Why? WHY DON'T THEY JUST LISTEN?

This just crushed me.  I think I learned a rough lesson too.  Sometimes you do have to be biting  despite the fact that you feel like the world's worst parent.  I think this did sink in a little to them and to me.  I don't know how long it is going to last.  For now, my kids have their tails between their legs.  For now, all I have to do is mention the trip to the rides that never happened.  For now, they are doing what they should be doing all the time...listening.


Thursday, August 2, 2012

Mommy Time (Be aware it is a poop story)

So, it has been quite some time since I blogged and what it comes down to, every time I want to blog about whatever it may be, I run out of time.  As it is right now, I thought I was going to have a chance.  Well, yes, I am blogging, but not to the extent that I want because my 16 month old is really itching to get out of that crib.  I was hoping for a little bit of "Mommy Time" while my two boys napped.

Well, as my younger son was napping, I put my older son down.  Now, he did just get potty-trained.  Keeping that in mind, he is not the best at holding it while sleeping.  He still wears a Pull-Up for naps and bedtime.  So, I put the little bugger down, and I just had a feeling that he was going to, yep you know it, poop.  When I walked out of his room, I simply knew it.  I was even going to question him about it, which, of course, I should have but did not.

After leaving his room, I walked out and started up a "My Little Pony" because my daughter is obsessed with them right now.  Just so you know, if you have a Netflix streaming subscription there is a 52 episode series on there.  She pretty much blew through them in a matter of 2 weeks.

Soon after the opening song began, I hear my son's footsteps coming up behind me.  He says, "Daddy, I pooped." Yes!  He wants Daddy!  Phew, I am glad I don't have to deal with that....I thought.  Milliseconds later, "Oh, no, I want Mommy."  Damn!  On the trek back to his room, I noticed that he was walking funny.  Yep, he had that I pooped all over myself walk.  Sure enough.  It was everywhere.  All down his legs.  On the carpet.  On the crib. On the sheets.  It even got on me.  The boy needed a shower.  The boy did not want a shower.  The boy began to scream.

I had to clean up the rug, change the sheets, clean off the crib, wash the sheets while my husband wrangled him into the shower.  Oh, I did eventually get to change my clothes.

The screaming subsided and everything was ok, until my husband got him out of the shower and asked me where the Motrin was.  As he walked into the kitchen to get it, who starts crying...the baby.  Grrrrr!

Mommy time is gone.  So there was my 5 minutes of Mommy Time.  I hope you enjoyed my 5 minutes to myself. :0) Now, I have to go get the baby and make sure that my older son hasn't fallen asleep (because I am sure he will now) because it is too late for him to take a nap.  "Too late to take a nap"...I think that is another post for a blog in and of itself.  TTFN

Ha ha ha, I didn't even get to finish proofreading this before my son was standing before me with his V-Reader.  The batteries died.  Of course, they did.  There too is another topic for a blog or an inventor to come up with some sort of battery that doesn't die at critical times.

Friday, July 20, 2012

Kid Kamp~Week 5~Wizard of Oz & Bats

So this week was supposed to be Wizard of Oz and Bats.  Well other than a file folder workbook about the Wizard of Oz that my daughter worked on, that was it.  I had to do summer school and the kids had swim camp.  So, there wasn't much entertaining on my part that needed to be done or could be done.

My daughter worked on this Preschool Pack from 1+1+1=1.

Then we made paper plate pizzas and learned about fractions.  That really was it for this week

My sweet daughter really wanted to share some "pizza" with our dog too.

Next week, my kids have VBS and I have to work again, which means I will probably have a really small blog again.

TTFN...

Kid Kamp~Week 4~Princesses & Knights Cont.

I just realized, I am totally a week behind.  Here is my post for P & K week.  When I finish this, hopefully I will have time to work on what we did this week.

Well, we rounded out Princesses & Knights week with a bang.  We didn't do much but we did make some really cute Princess and Knight mirrors AND we made it all the way up to Medieval Times (with no accidents for my newly potty trained son :0).

So I posted earlier about my Paper Bag Princess book being taken out at the library.  I never got it.  We just worked with the others that I had.  They were, in case you missed it
My daughter loved the Paper Princess stories.

Now, I did get a bunch of books about knights as well.  But my son just wasn't into them.  Again, he was focused on the potty training (I now have officially two children potty trained.  Just one more to go).  I apologize, but I don't remember the names of the books.  They were basically just kid versions of reference books about knights.  Very straight forward information.


My daughter is very much into doing workbooks.  So, again, we made another file folder workbook using this Princess Preschool Pack from 1+1+1=1.  She has some amazing stuff.

Then we made the mirrors.  I got the idea from here. This is what it is supposed to look like


I used what materials I had on hand.  We used

  1. foam frame
  2. glitter glue
  3. double sided tape
  4. large Popsicle stick 
  5. tin foil
  6. cardboard
  7. glue
  8. duct tape
And the steps are
  1. cut cardboard to fit to the back of the foam frame
  2. tear off a piece of tin foil and cover the cardboard with the shiny side out--use double sided tape to secure 
  3. glue tin foil covered cardboard to the frame
  4. glue the popsicle stick to the back & duct tape it secure it
  5. now decorate with glitter glue or gems or whatever
Here are my Princess's and Knight's mirrors.


To close out the week, we went to Medieval Times.  This place is so cool.  If you have never been, it is essentially dinner theater set in Medieval Times.  It is in a castle.  When you enter, you are given a crown and a knight of a certain color to cheer for.  Ours was the red and yellow knight.  You are then escorted into the public square area where there are plenty of kiosks to buy STUFF--princess crowns, tiaras, cone shaped crowns, dresses & gowns, swords, scepters, shields, both wooden and flashing.  Don't forget the drinks, the $10 12oz Slurpees in flashing glasses that my kids had to have.

Then the show begins.  The crier lets you know where to sit.  The king and princess come out and so on and so forth.  There are six knights--3 from the west and 3 from the east.  They do all sorts of competitions--hook the ring with their lance, throw a spear into a target, and the JOUST--so exciting.  After the knights joust, they sword fight "to the death".  My daughter was screeching like it was real.  She loved it but, it was really intense for her.  My son got really into cheering for our knight, "go ret an yeh-do, go ret an yeh-do" (translation--go red and yellow).

Next comes the medieval feast with no utensils.  And don't ask for utensils they publicly mock you if you do.  A table was mocked while we were there.  The food was pretty tasty too. You get a tomato soup (my kids LOVED this), with a focaccia bread for dipping.  A chicken quarter, spare rib and potato wedges.  For dessert a yummy apple tart.  I will say it is NOT cheap, but we did have a really good time.  If you ever get a chance and you have the money to go, it is a good time.


After all this, my son was finally into the knight books.

Wednesday, July 11, 2012

Kid Kamp~Week 4~Princesses & Knights

Princess and knights...I have been waiting for this one.  I have a lot of fun stuff planned.  Or maybe I should say HAD a lot of fun stuff planned.  First, the book that I was going to focus pretty much everything around, The Paper Bag Princess, was taken out of the library.  Do you believe it?  Here's the funny thing.  I went yesterday with my daughter to get it and the librarian told me that the book is NEVER taken out. No one ever borrows it.  Ugh!  Well, we did get a few other really good ones.


I recommend all of them, especially the The Paper Princess ones.  There is a third as well, The Paper Princess Flies Again--with Her Dog.  The Paper Princess books really did the trick.  We made our own paper princesses.

I copied a picture of the paper doll and then traced the outline.  I am not an artist, so we needed the help of an outline.  We cut them out and stuck them on popsicle sticks to use as puppets.

As you can see there is nothing about knights yet.  My son is in the middle of potty training so he is focused on the potty, not on knights right now.

We are planning a trip to Medieval Times on Friday.  I am hoping he will be trained enough to make the trek.  It is over an hour a way.  I am bringing several changes of clothes with me and the Potette, which if you don't have one and have young children,  I definitely suggest the investment.  It is a portable potty. It is so worth it.

There is still more to come.  Hopefully, I will get to it.  I posted now because I actually had the time.  Stay tuned--more to come--fingers crossed :0)

Tuesday, July 10, 2012

Kid Kamp~Week #3~America (Sorta)

Well, America week didn't really happen..  We were really busy, hence the lack in posting on my part. We went on vacation to PA Dutch, Lancaster county.

I themed everything around America being that it was the week of the Fourth.  But, really other than a BBQ and fireworks, we didn't do anything that I planned.  Eh, it was all good.  So, instead of posting about all the Kid Kamp stuff, I think I will share what we did out in PA.

First, I have to say PA Dutch is a great place to vacation with a young family.  It is super friendly to nursing mothers as well.  Pretty much every place out there has a nursing station.  PA Dutch was the first family vacation we ever took.  I only had two kids at the time.  My daughter was 2 years and my son was only 3 months and still nursing.

The second thing that is so wonderful about PA is the place that we stay.  We stay on a dairy farm in a guest house.  My kids just love it.  We stay at Meadow View K Farms Guest House in Mount Joy.  One of the things that makes it so great is the owners, Barry and Sharon Krieder.  They are so warm and welcoming.  Next thing, is the fact that it has 3 bedrooms, full kitchen and they have a washer/dryer.  We always bring food and eat many of our meals there.  Now, I am just going to list all the other wonderful things that they offer...

  1. Kids get to feed the baby calves
  2. Kids get fresh farm eggs right from the chicken coupe
  3. They have a pony named Sunny
  4. Barry will give the kids a barrel train ride
  5. They have corn fields surrounding the farm house
  6. It is an old farm house with an old barn which just adds to the ambiance
  7. You look out the kitchen window and there are cows right there in the meadow or "medda" as they say
  8. They have several John Deer mini-tractor toys for the kids to ride on
  9. There is a really cool wind mill in the front yard
  10. The farm has beautiful light in the AM
  11. Lightning bugs, lightning bugs, lighting bugs EVERYWHERE
  12. Swing set in the back
  13. About 3 minutes away from food stores
  14. About 15 minutes away from most of the attractions
Only a few of my favorite pix from the Farm
Every year that we go out we try to hit at least one new place.  This year we went to 2 new ones.  We live about 2+ hours away, so we like to stop somewhere in the middle to break up the drive.  This year we stopped at the Crayola Factory.  I can't believe we never went there before.  Just in case you plan to go and have never been, plan on staying there for a while--at least 3+ hours, probably closer to 4.  We got a late start and didn't get to see the whole place.  Now we know for next time.  

The Crayola Factory I think is a must.  And it wasn't terribly expensive--$12/person & children 23 months and under are free.

On our way home, we stopped at the Lancaster Science Factory.   This was another great find.  Affordable ($8/adults, $6.50/kids, 2 and under free) and fun.  If you are a teacher, bring your teacher ID.  Teachers get in for free.  My husband and I are both teachers so we only had to pay for 2 of our kids.  This is a single floor, open space science play land. When we first walked in, I was a little disappointed because it wasn't that big.  Well, three hours later, this was one of the best places that we hit out there.     

Yes, that is my awesome water tornado in the upper left corner there
Another great place, new to us last year, is the Turkey Hill Experience.  Again our kids had so much fun.  Plus, you get to sample some yummy ice cream.  We were also able to score some discounted tickets off Certifikid as well.


Another reason I love this place is because of this

You get to make your own commercial and your own flavor of ice cream.  Mine was Twisted Caramash Cake Crunch.  Now you don't actually get the ice cream but it is fun to create your own idea.

My Flavor - TWISTED CARAMARSH CAKE CRUNCH

There she is.  Beautiful!

Other than my top three above, we also love....

  1. Dutch Wonderland
  2. Railroad Museum of Pennsylvania
  3. Strasburg Railroad
  4. Choo Choo Barn
  5. Strugis Pretzel
  6. Wilbur Chocolate
  7. North Museum of Natural History
We also really like...
  1. Hands-on-House
  2. Elmwood Park Zoo
  3. Cherry Crest Farms
  4. Hayloft Candles and Petting Zoo (homemade ice cream)--FREE
Places that we plan to visit in the future

I hope if you are traveling to PA Dutch this helps out a bit.  

Saturday, June 30, 2012

KId Kamp-PONDS-Week #2

I know I have been seriously behind in blogging.  I can't believe this week has gone by so fast.  I am still working on a reflection of last week's Kid Kamp.  I want to get that out, but I think that might be a reflection for 2 weeks at this point.

Well, we did ponds this week.  I got these great printables from Home School Creations.  Wonderful stuff.  I got many of my theme ideas from there.  My daughter and I, while my sons were napping, started doing Part I to the ponds pack.  She finished the whole thing in no time.  I 3-hole punched the pack and put it in a 3-hole punched manila folder.  I used brass fasteners to secure it.  She loved it.  She colored it and decorated it and had a blast.

Inside were many math and literacy activities.  She loves to do workbooks so this was good fun for her.  Sorry no pix.

On Monday afternoon, the 2 kids and I went to the library and got a bunch of books on ponds.  My husband did all of that reading to them before they went to bed at night. They really had fun going and picking out books.  And the librarian was great.  We told her what we were looking for and she brought us to a whole section on ponds.

On Tuesday, we built our ecosystem.  This is so unbelievably cool.  I think I am more impressed with it than my kids are.  We got the idea from Cranberry Corner.  She also suggests a link to Scribbit with more detailed instructions.  We used both.

What you need
* 3 clear 2-liter emptied & cleaned soda bottles (you need 3 for each system you create)
* clear packing tape
* fish gravel
* water
* dechlorinator
* rubber band
* small piece of netting or pantyhose (I used a ped from the shoe store)
* soil
* small fish, snails, and other small animals (we used shrimp & a loach, but he passed)
* aquatic plants like anachris
* crickets, potato bugs and earthworms
* sticks, dried leaves
* seeds or small plant


We cut the bottles so we will have three levels (basement=pond life, coupler and top level=earth level). 

* Basement level--cut off top (not too much--you want a deep basement)
* Coupler--top and bottom cut off (this will fit between the other 2 levels to allow air to circulate between them)
* Earth level--cut off just the bottom...but keep it!  This needs to be re-attached.

In order: earth level, coupler and basement
BASEMENT
  • Add in gravel to basement level
  • Add the plant
  • Pour in water along with the dechlorinator 
  • Add in your pond creatures (we got small gold fish, shrimp, and 2 snails)

EARTH LEVEL
  • Place the netting around the mouth of the bottle and secure it with the rubber band
  • Holding the bottle upside down, so that the mouth is now on the bottom, add in gravel for drainage
  • Add in the soil
  • We added in some chive seeds because that was what we had on hand.  But you can add in a plant or other seeds.
  • My kids found small sticks and dead leaves to add in
Then the bug hunt began.
We moved my planters around and found a couple of earthworms to add.  I had to do some serious searching to find potato bugs.  Had to dig up my slate slabs for them.  I figured trying to catch crickets would be impossible, so I bought them at the pet store.
  • The bugs were added 
  • Place the original bottom of the bottle (now the top) in place and tape it on

COUPLER
  • Place the earth level inside the coupler and seal with tape
  • Place this whole unit on top of the basement level
  • Secure with tape BUT make sure you fold the tape over so you can easily remove it if need be
I have had to re-tape that section a million times.  We have had several casualties since the ecosystem began.

Our shrimp and one of the snails.  Sadly, this shrimpy did not make it through the night.  
So far on our journey, I have made a few trips to the pet store to replenish our lost friends.  To date, we have lost one shrimp, one goldfish and one loach, which is a small eel-like creature.  I was very sad to lose the loach as the pet store associate informed me that they truly enjoy eating poop.  I thought he would be a great addition to our ecosystem.  He will be missed.

As of this moment, surviving, we have 2 goldfish, 2 snails, 2 shrimp and an algae eater in the pond level.  As for the earth level, I can't see in there for the condensation is so thick, which is what we want.  I still have no chive sprouts.

All are harmoniously living together, which is the point of an ecosystem.  I will keep you updated on it.  TTFN.


Sunday, June 24, 2012

KID KAMP~DINOS Cont.

Well, I counted today, Sunday, as a part of Dinos week.  We didn't get to everything I planned so I dragged it out a bit.  Still never made the paper plate T-Rex, eh, if we get to it, we get to it.

To put the finishing touches on Dinos week we did the DIY fossils.  Those turned out really great.  We also made fossil cookies.

For the DIY fossils I followed this recipe.  It was pretty much perfect.

  • 1 cup flour
  • 1 cup dirt
  • 1/2 cup sand (play sand works the best)
  • 1 cup water
  • 12 tiny plastic dinosaurs
  • Plastic wrap-lined cookie tray
I did change it a little.  I divided everything in half so that each of my kids had a share.  But, I added double the amount of play sand--1/2 C each of the flour, sand, dirt and water.  I also lined my cookie sheet with tin foil.  My kids had so much fun doing this.

They mixed all the dry ingredients first.  Then I added water and they loved squishing it until it became dough-like.  My 3 yr old was really good at it.  


Next, the kiddies and I wrapped up the mini dinos in the dough. We rolled them in a little extra play sand, then set them out on the cookie sheet to dry. It rained the day we made them, so I had to keep them in the garage overnight.  The next day, I set them out early in the AM in the sun.  After dinner, we broke them up.  


I wound up making double the amount because they thought it was so cool.  

When they were dry, the kids donned their safety glasses and "hard hats" once again.  Armed with their hammers, they went to work. 

Love this pic of my son.  He looks like a geologist inspecting an all important rock.


I was really happy with the way the fossils turned out.  I say this is a definite 2 thumbs up.  My kids loved the ice fossils, but I think they really liked this one better.  

Another fun thing we did yesterday was make fossil cookies.  Idea from here. I totally did not follow her recipe at all.  And, yes, I will admit, hers look a whole lot better than mine.  
Hers
Mine
All I did was follow Betty--love her; Betty Crocker sugar cookie mix in the bag.  I followed the cut out recipe, but I did add more flour.  I should have added even more. We also made a lava fossil cookie--just add some Nutella and raspberry extract. I used a mini ice cream scooper to portion out the dough.  Each kid got some, balled it up and placed them on the cookie sheet. We pressed tiny dinosaurs, centipedes and other bugs into the dough.  Baked them for about 13 min @ 375 and poof, fossil cookies.  


**************************************************************
KOOL-AID ICE PAINTING
Getting back to the Kool-Aid painting...we finally did that, well, we finally made them.  Tomorrow we may get to paint with them.  


We needed more tiny dinos for the fossil cookies, so we headed over to The Dollar Tree yesterday.  Whilst there, got a ton more than I actually needed, I scored a Popsicle mold.  Here they are.


Never mind the mess on the island there.  Just haven't had the time to be too tidy.  I am working on that though.  


First, they smelled awesome.  But, taste-wise, I added no sugar.  Kids were rather disappointed and shocked that they tasted so bad.  Pink (pink-lemonade), blue (blue/rasp-lemonade), red (cherry) and orange (orange) were our palette.  I made the colors pretty intense.  I only measured out the amount of water I would need to fill 2 Popscicle sections per packet.  It was about a 1/4 C of water.  Each kiddie had a measuring cup with the water.  I added in the packet.  They stirred and they poured into the molds.  They are set in the freezer and they are frozen.  We just now have to paint with them.  


I hope all that makes sense.  I am pooped.  Between double classes at Gymboree, running through the "Leaky Lizard" (a lizard shaped sprinkler) in the backyard, and the beach after hours, I am done.  I have no idea how I have made it this long.  


Ok, I am out...TTFN. Tomorrow starts POND week.  

Thursday, June 21, 2012

Kid Kamp~DINOS~Week 1

*DINOS*
We had some fun this week.  It was short and I didn't get to do all the things that I wanted.  I still had to work on Monday.  My son had swim lessons all week. Plus, the dentist.  A play date for my daughter. And, it got really hot around here.  But, we still have one more day before the week is over.

What we did...
Made dinos out of paper plates.  Got the idea from here. I just found a site to make paper plate T-Rex's, which my daughter so desperately wanted to make.  I think we will have to do that one tomorrow.  My son decided to turn his dino into a rainbow.


All you need for this is...
1. paper plates
2. markers/paint/crayons
3. brass fasteners
4. hole puncher

Mine is to the left.  My daughter's to the right.  My son's "rainbow" is up on top :0)
Oh, I also filled the $1 Sterilite shoe boxes from Walmart with new crayons, markers, color pencils, kid scissors, and a glue stick for each of my kiddies.  I also made name labels for them on Avery.com.


Our next adventure was to break open some ice fossils.  Got that idea from here. I stuffed toy dinos into balloons and added food coloring and water. Froze them.

Then the excavation began.  The kiddies donned their hard hats.  Got those from Oriental Trading--left overs from my son's birthday party.  I bought safety glasses for them and I am so happy I did.  I got a 3 pack from Home Depot for around $7.00.  I got some hammers and they went to town.


Ice went flying everywhere.  So the safety glasses are a necessity.  


I think tomorrow I am going to try my hand at making some DIY fossils.  Idea from here. All you need is 
1 cup flour
1 cup dirt
1/2 cup sand (play sand works the best)
1 cup water
12 tiny plastic dinosaurs
Plastic wrap-lined cookie tray

Mix everything together adding more flour/dirt/sand as needed.  Coat the dinos into the mixture.  Ball them up and set them in the sun to dry.  Sounds easy enough, right?  I will let you know how that one goes.  

Since it was so hot today, I wanted to do another fun ice activity.  Having ice freeze in balloons took too long, so, we decided to ice paint.  Idea from here. She froze water colors.  I froze food coloring and water because that was what I had.  I was also thinking about freezing unsweetened Kool-Aid.  I think I will do that tomorrow too.  


I let the kiddies fill their ice cube trays.  Surprisingly my son did a good job.  I was quite rightly impressed.  Got the star trays from Walmart and The Dollar Tree. I couldn't find my red food coloring, so we could only work in blues, greens and yellows.  

After the cubes were frozen, we took them out in the back yard and painted. 


Of course, my kids decided to eat the ice cubes, which was fine.  I am glad I used food coloring instead of paint.  

Oh, and if you attempt this, make sure you put them in clothes you don't mind getting stained.  

We also just let some ice paints sit and melt.  With the heat they melted in no time and it looked pretty cool too.  
********************************************************************

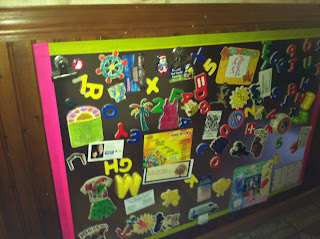
I have to add in, while I was in Home Depot buying the safety glasses, I also bought some sheet metal.  I got 3 sheets--$9.54 (I believe) each.  The edges were sharp, but I taped them with some decorative duck tape (The Dollar Tree). I adhered them to one of my kitchen walls with 3M tabs.  So far they are sticking well.  Now I have 3 magnetic boards in my kitchen.  My husband is quite happy--all the magnets are off the fridge.


I know, pictures not great, but you get the idea.  The one on top is actually on the bottom of my kitchen wall.  The kids can easily access that one.  My 15-month old is having a blast with it.  The 2nd pic, is of two, one above the other.  I have the kids' calendar there.  I am going to set up a weather station too.

The thing that makes these so great besides being magnetic, they will also double as dry erase boards!

My blog for this week is done.  I will add more on how my DIY fossils went.  TTFN!

Tuesday, June 12, 2012

"KOOL" Classmate Gifts--2012

I finally got my daughter's classmate gifts done.  Each of her classmates is getting Kool-Aid packets with a list of 10 different things that they can do with Kool-Aid besides drink it.  This was very inexpensive.  The only items that I spent any money on were the Kool-Aid packets. Everything else I already had at home.

All you need...
  1. Plastic baggies
  2. Kool-Aid packets (I did 3 per each child)
  3. Stapler
  4. Paper
  5. Labels
  6. Computer/printer
  7. Scissors--I used the decorative edged scissors

I printed up some blister pack toppers.  I did those in Publisher.  As soon as I figure out how to upload the template I will.  
The top section is inverted so when folded it will be right side up

Next, I stuffed 3 packets into the plastic sandwich bag.  Folded the bag in half so the Kool-Aid packets were to one side.  Sealed it and then stapled the topper to it.  I then added name labels. I made those at Avery.com.

FRONT
BACK

My 10 Kool Things to do with Kool-Aid Besides Drink It are...

1. Kool Play-dohMix 1C flour, 1/2 C salt & Kool-Aid powder in bowl. Add 1C boiling water & 3T oil. Stir until mixture forms a ball. Gently knead a couple of times then set aside to cool. Keep in a re-sealable plastic bag or in small container.
2. Kool Eggs—mix Kool-Aid packet & 2/3 C water. Set hardboiled eggs in mixture until desired intensity
3. Kool Frosting—mix any flavor Kool-Aid into your favorite frosting
4. Kool Scratch & Sniff Paint—mix Kool-Aid with water (more H2O=lighter color; less H2O=more intense color) OR mix with same color tempra paints
5. Kool Scented Sensory Rice/Pasta/Sand—completely dissolve Kool-Aid in a small amount of hot water. Mix 1T rubbing alcohol, 1-2Ts of dissolved Kool-Aid w/ 1C white, uncooked rice/pasta/sand.  Lay out on wax paper/tin foil covered cookie sheets until completely dry. Store in baggie
6. Kool Cookies/Cupcakes—add Kool-Aid to favorite cookie/cupcake recipe for a flavor boost
7. Kool Spritz Tie-Dye—combine 1/2 C water, 1/2 C vinegar/rubbing alcohol & 2 pkgs Kool-Aid.  Pour into spray bottle.  Hang up T-shirt, “spritz”, dry & set in dryer on hot before washing. 
8. Kool Popcorn—boil 2C sugar, 1C corn syrup, 2/3 C butter for 3 min.  Spread 6 quarts popped popcorn on cookie sheet. Combo Kool-Aid w/ 1t baking soda.  Add to sugar mix.  Then pour over popcorn & mix.  Place in 225 oven for 30 min stirring every 10.  When cool break apart. 
9. Kool Scented Sidewalk Paint1C water, 1C cornstarch.  Mix. Pour in cups.  Mix in various flavors of Kool-Aid and paint
10. Kool Ice Cube Art—mix Kool-Aid with water to desired color intensity.  Pour in ice cube trays and freeze. Once frozen, set out on white sheet, shirt, canvas, anything and allow to melt in the sun.   When dry, you have “art” Or freeze w/ popsicle sticks and use as “paint brushes”.

*BONUS—for the parents, use lemonade Kool-Aid to clean out your dishwasher.  Pour 1 packet into the detergent dispenser and run the empty dishwasher.  


Sunday, June 10, 2012

2012 Teacher Gifts--Hand Print Jugs w/ Summer Goodies

Fortunately this year my daughter and son have the same teachers.  I only had to come up with two gifts as opposed to four.  What I came up with turned out better than what I thought.  I got the idea from Rachel Berry {The Blog}.  I changed it just a bit.


I got these really inexpensive gallon jugs from Walmart.  I like to have things personalized, so I painted my kids' hands and then they placed their prints all over the jugs.


They always love to get their hands painted.  After the paint dried, I did a Mod Podge coat.  I also used a Sharpie to write the kids' names and the year on the bottom.  I Mod Podged over that too.  

I then stuffed them with...
  1. A magazine--found a coupon for it in the store
  2. A beach towel--Walmart
  3. Chap stick--on clearance at Stop and Shop
  4. Tic Tacs--impulse buy
  5. Gift cards to Wawa--love their coffee way more than Dunkin' Donuts
  6. Variety of candy--M&M's, Starbursts, etc...
I also added in 2 packets of Kool-Aid with 2 drink recipes.  For my daughter's class, we are giving her classmates 3 packets of Kool-Aid with a list of 10 things to do with Kool-Aid besides drink it.  More on that to come.  Anyway, I mentioned it because of the connection to the teachers' gifts.  

I added in packets of cherry and lemonade Kool-Aid and I typed up recipe cards for "Howellabama Cherry Lemonade" (alcoholic) and "Super Kool Cherry Lemonade" (non-alcoholic). If you are wondering, "Howellabama" is simply a silly name for the area we live in. 

RECIPES...
Howellabama Cherry Lemonade
*1 Cherry Kool-Aid packet
*1 Lemonade Kool-Aid packet
*3 quarts water
*1 C sugar
*1 can Sprite
*1-2 C vodka (combination of cherry and lemon vodkas is best)
*1/4-1/2 C sour mix
~Option—a combined 1/2 gallon of cherry & lemon sherbert or Italian ices

Mix Kool-Aid packets, water and sugar until dissolved. If using the sherbert/ices, add these along with a lot of ice into the container you will be using to serve the punch. Pour in the Kool-Aid, vodkas and sour mix. Stir. Top off with the Sprite. Can add lemon slices and cherries to pitcher. Serve.

Super 'Kool' Cherry Lemonade (non-alcoholic)
*1 Cherry Kool-Aid packet
*1 Lemonade Kool-Aid packet
*3 quarts water
*1 C sugar
*1 can Sprite
*1 C orange juice
*1 lemon sliced
*1 jar maraschino cherries
*1/2 gallon of cherry & lemon sherbert or Italian ices

Mix Kool-Aid packets, water and sugar until dissolved. Add sherbert/Italian ices along with ice into the container you will be using to serve the punch. Pour in the Kool-Aid and orange juice. Stir. Top off with the Sprite. Add lemon slices and cherries with juice to pitcher. Serve. Adjust sugar to sweetness desired.

I stuffed all of the above into the jugs and tied on some ribbon. 


The magazine was too tall to attach the lid, so I did have to do some finagling with rubber bands and ribbon to get the lid to stay on.  

Once all was said and done, I created little cards on Avery.com and did the curl-the-ribbon-with-scissors thing and ta da dat ta da....


They came out really cute...I wrote on the cards the teachers' names and 
"Thank you for being my teacher this year.  Here are some gifts to enjoy poolside or on the beach. I hope these gifts help to keep you "kool" this summer."

My daughter's classmate gifts are next in line...